Friday, October 29, 2010

Zeus & Hera Halloween Invites

These are for a Halloween party someone was throwing she had a whole theme and wanted the invite to reflect that... the columns are from PaperDoll Dress-Up cut to fit my card (it measures 6x6) on the Gypsy, then I inked them with white and grey from CTMH. The letters for Zeus and Hera are cut from the Calligraphy cart at 1.5 (H) by .58 (W) on the gypsy as well.I used the DCWV Amber Autumn cardstock stack gold glitter for them. All the info was printed from my computer on vellum and then I just tore the edges.
I also inked the edges of the card with white.
I cut a pumpkin from PaperDoll Dress-Up as well at 2 inches. The white cardstock is inked with purple.
Dont forget to enter my giveaway. You can find a link at the top of the page :)

Thursday, October 28, 2010

More Pocket Thank You cards

I made more of these for my craft fair since I had sold all the others to the guy at the office. You can scroll down a couple to find the original post. I used Stamped again for the tag and a Close To My Heart stamp for the sentiment. I used all DCWV cardstock and paper.

Wednesday, October 27, 2010

Cupcake box

I made this cute box for fun, I cut the box from Sweet Treats at 3-1/2 and used all my different colored stickles for the sprinkles, the flower is cut from green shimmer paper and then I added a button with some sparkle fibers through the middle. The yellow cardstock was ran through my paper crimper and inked with platinum planet ink. The tag was cut from Stamped at 2-1/2 I inked the yellow cardstock again with platinum planet ink and stamped a sentiment from Scrappy Moms Stamps. I also made the filler paper by running it through my paper shredder and then through the paper crimper. I added a wire handle to carry it.

Tuesday, October 26, 2010

Pocket Thank You cards

Someone asked me to make a bunch of these for his office to send out when they get patient referrals. He wanted something that would hold a gift card and be unisex so this is what I came up with... 12x12 cardstock cut to 11x12, cut at 4 and 8 inches on the 12 inch side. Score at 1-3/4 and 5-1/2 then zig zag fold. I added a white piece of cardstock to this dark purple one so it wouldn't be hard for them to write inside. I added some ribbon across the z flap so that on the inside...
they would be able to stick the gift card!
Here are some other ones I made for him as well. The tag was cut from Once Upon A Princess pg. 37 at 1-1/4. Sentiment is from Close To My Heart.
Here is the whole pile of them, super easy and fairly quick!

Monday, October 25, 2010

Fantabulous Cricut #33- Halloween

For this weeks Challenge me Monday from Fantabulous Cricut the theme was Halloween, I have had these green tin buckets for a couple years from Target so I thought I would hurry and stick a cool Frankenstein face on it from Happy Hauntings for fun. This face is cut really big at 13 inches and it fit perfectly on my 4 inch bucket. I love his stitches :) anyway then I filled up a cute bag with some candy corn and put that inside. Super quick, Super easy and Super cheap!

Friday, October 22, 2010

Decoupage Pumpkin Trio

These were pretty easy and fun to make, I had this wood in the garage so I had my husband cut pumpkins out for me. I painted it brown, let it dry completely! picked my papers, these are from DCWV Amber Autumn stack, cut to fit the pumpkins :) Then I inked the edges with chocolate from CTMH, then I put a thin coat of Mod Podge down and adhered the paper. Sanded the edges of the pumpkins and the papers with 100 grit. Added another coat of Mod Podge, wrapped some raffia around and some wire on top and VOILA... all done! :)

Thursday, October 21, 2010

I'll see you through the storm...

I made these for fun the other day, I have had this stamp set from Clear Dollar Stamps for quite a while and never used it so I got it out the other day and played around with it. This one is called Charliene April Showers and it is so cute, there are a few more stamps that come with this set that I didn't use. I love Clear Dollar Stamps for there great prices :)
 I colored these in with my stamp pads and aqua pen, all paper is Die Cuts With A View. I also added some jewels.

Wednesday, October 20, 2010

From Our Web to Yours!

I made this card for the ClearlyiStamp challenge this month, their theme was to use black and orange with purple. I have had this stamp set called "Web Notes" for a little while and never got to use it so I knew right away I was going to pull it out and give it a try :) I used Versamark ink with the rectangle stamp (it's actually a web) and then clear embossing powder on top. I stamped the little spiders with purple ink. I used versafine in black to stamp the sentiment and then clear embossing powder on that as well. Then I got out my new drippy goo punch from Martha Stewart that my sister got for me.. THANKS sis :) and punched the bottom of the orange then I punched a purple scrap piece of cardstock and adhered that under the orange. I added some orange ribbon and tied a bow and then stuck the spiders and sentiment on with pop dots.
 

Tuesday, October 19, 2010

Review and a giveaway.

I love shopping for new furniture and browsing websites to see what everyone has to offer. I found this cute table from CSNStores and really liked it. They have lots of different drop leaf tables to choose from in lots of different styles and colors. If your in the market for some fun new things to decorate your home you should check out there site, they offer great quality products with great prices and free shipping on just about everything.

I am going to put together a little goody box of scrappin stuff for someone special to win all you have to do is leave a comment on this post. If you want a 2nd chance blog or facebook about this giveaway and leave a separate comment. For a 3rd chance just leave me a comment telling me how you found my blog :) I am leaving town for about 10 days so I will leave this open until October 31st and draw a winner on Monday November 1st. If I get over 100 comments I will add to the box of goodies :)

Better Get Better!

So this is what I did with the girls I colored in with my new BIC Mark-It markers. I think they turned out pretty cute in the end :) I used Once Upon A Princess to cut the tags I stamped on, the white one was cut at width 3.5 and the height 2 and the brown layer was width 4.12 by height 2.35 I used my gypsy.
 

Monday, October 18, 2010

Fantabulous Cricut #32- Leaves... and the BIC Winners!

Hey Everyone, welcome back for another Challenge me Monday from the Fantabulous Cricut Challenge Blog :) This week's theme was to make a project with leaves on it. I used Create A Critter cutting the leaves anywhere from 1-2 inches from the new Amber Autumn DCWV cardstock stack. I used the orange, red and brown shimmer carrstock (seriously it's NOT purple) Then I used a little stamp from Close To My Heart and stamped on the orange one with black ink and then I heat embossed with clear powder. The green leaf paper is also DCWV Song Bird stack. I added some orange from Bazzill behind it and inked the edge of the white base with chocolate from CTMH as well. To finish it off I added some pretty orange/yellow shimmer, fall ribbon! Pretty descriptive huh?! ;) Thanks for stopping by today, be sure to check out the other Design Team projects and enter for your chance to win some great prizes at the FCCB!
 Here's a little better of a shot at the brown shimmer paper ;)
Also I am sure you all are dying to know if you were picked by random.org to be the lucky winner of the BIC mark-it markers so here we go...

1st winner is....
Kelly Massman


2nd winner is...
The Swapp Fam

3rd winner is...
Valine

If you guys can please email me your address I will get these out to in the next couple days.
A huge Thanks to BIC for giving me this opportunity to review such a great product. I think it's really nice that company's are starting to make things with crafters in mind and take the cost into consideration as well! Also a big thanks to those that have followed me from the beginning and my many new followers I have received in the last week, it's because of you that I am able to do these fun giveaways! :) 

Friday, October 15, 2010

Some Halloween Cards for a friend.

Seems like most of these cards I have posted lately have been for people ordering specific things... these were for a long time friend that needed some Halloween cards for her nieces and nephews, the great thing about them is that the cards came with the web already on them :) All I added was the green shimmer paper from the Amber Autumn DCWV stack and them I cut "Happy Halloween" from Wild Card at 3 inches. The spider is from Doodlecharms cut at 1-3/4 also from DCWV cardstock. Then I added some googly eyes and doodling with my white gel pen.
 
 These were in the same package (I got them last year from a friend) they came in the shape of a haunted house. I added the purple and orange shimmer paper behind the windows and then cut some ghosts and tombstones from Paper Doll Dress-Up at 2 inches. Spiders are from Doodlecharms again cut at 1-3/4. "Boo" is from Wild Card cut at 1-3/4 then I added more doodling with the white gel pen and some more googly eyes.
 
These were more labor intensive. Spiders are from PPDU cut at 3-1/4 and 2-3/4, ghost is cut at 4-1/4 as well as the spider web. I inked the ghost with grey wool from CTMH and detailed the spiders with white gel pen.
Dont forget about my BIC marker giveaway going on until Sunday October 17th, you can find it HERE!

Thursday, October 14, 2010

Baby Shower cake

A friend of mine asked me to make a baby shower cake for someone else and of course I said yes! The train is cut at 3-1/2 from New Arrival, the sign is from George red cardsock cut at 1-1/2 and white cut at 1-1/4, and the frog and worm were cut from Create A Critter at 1-1/4. Don't forget to sign up for the giveaway HERE. :)

Wednesday, October 13, 2010

"Hi" and "Hello" cards Pink/Green

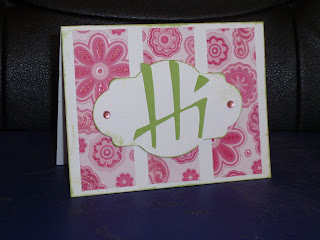
I finally finished up making the cards a friend of mine asked me to make for her mom. I think these really turned out fun and pretty. Background cardstock is from DCWV Sweet Treats Stack and how easy is that to use nothing but that cardstock for the main image of the card?! All I did was use a Martha Stewart border punch at the bottom :) I also used Wild Card for the "hi" cut at 2-1/4 inches and wrapped some green ribbon around the bottom from Papertrey Ink.
 You might have seen a version of this before but I had to add it again because I messed something up and wanted to tell you that even though I had it was still usable. I bet you would never guess where the goof up was at.... if you thought maybe under that dimensional glaze then you would have thought right! When I went to adhere this piece to the card I ended up putting glue from a glue pen all over the top... OOPS! I had to think of something to hide that since I had used all that color of paper and didn't want to search through everything I have to find some more. I think this was actually my favorite card because of the dimensional glaze that I had to add! Hello is cut from Lyrical Letters at 2-1/4.
 I also flocked the butterfly with Doodlebug crushed velvet on this one instead of the glitter like I did on THIS card.
Another view, maybe you can see the shine better...
 Here are some more that I made as well I used some more paper from DCWV this time the Citrus Stack, I also used another Martha Stewart border punch and some pink cardstock from Papertrey Ink. The sentiment is from Close To My Heart. Then I added another piece of pink across the green and cuttlebugged it and added some jewels.
I put this card and the last one up to show you what I did with the scraps I had leftover. The tag is from Once Upon A Princess cut at 2-1/2 (pg. 55) "hi" is from Wild Card cut at 2-1/4 I inked the edges and added some jewels.
On this one I used Once Upon A Princess again and the same tag from page 55 the pink tag is cut at 2-1/2 and the white tag is cut at 2 inches. I inked the edges of the white and stamped a happy birthday sentiment from a CTMH set.
Thanks for stopping by today, don't forget to check out my giveaway going on right now HERE.

Tuesday, October 12, 2010

Product Review for BIC Markers and a GREAT GIVEAWAY!!!

So about 3 weeks ago I was contacted by BIC asking me if I would do a product review of their new BIC Mark-It Markers in Fine and Ultra Fine... I was super excited to try them out not just because they were free but because I am able to do a giveaway as well :) So I get these markers and figure out what I want to color with them, this cute stamp from My Favorite Things caught my eye. Using my Gypsy and Once Upon a Princess I cut the shape out that I wanted to stamp her on, then using some black versafine ink I put my main image on the shape (this is a tag from page 58, sized according to my image) then I got busy with the markers. I have to say that with this really cool storage system they come in, it makes finding the right color a breeze. They were very easy to use with hardly any smell and the rubber grip on the pen was oh so comfy. I was also excited to see that they didn't bleed outside my stamped image. I did get a little through to the back of the paper but not much. I also loved the fact that I couldn't see lines where I had already colored... you know the ones where your coloring in a large image and you go back to fill in a part you might have missed and then you can see exactly where it was dry compared to fresh ink... not something I love, but with these markers I didn't have any of that, and that's something I do LOVE!
 Here are my girlies all colored in and looking pretty, I didn't have time to put them on cards because I wanted to focus on the coloring part today. I went back with my Crystal Stickles and added just a bit to her cute heart and her shoes :)
 I love the color range with these markers, I am pretty sure there is a light, medium and dark in all the color families and something else I loved where the names like, Ocean View Blue and Plumtastic Purple, they just call my name.. pick me... PICK ME!!
This is what 3, YES THREE of my lucky viewers will receive, ONE pack of FINE and ONE pack of ULTRA FINE 36 count markers. That's a total of 72 markers and a retail value of $41.98... WOW! Did I mention they are ACID FREE... how great is that, you can also use them to journal in your scrapbooks and not have to worry about it :)
So for your chance to win just leave a comment telling me what you would do with your markers if you won. If you would like and extra chance at winning then blog about this giveaway or share my link on facebook and tell me that you did in a separate comment :) You have until Sunday October 17th to enter and I'll pick the THREE lucky winners on October 18th! If you would like to learn more about these markers check out BIC's website at http://www.bicmarkit.com/

Monday, October 11, 2010

Fantabulous Cricut #31- On The Wall

Hello Everyone, this is my project for this week's Challenge Me Monday "On the Wall" theme from the Fantabulous Cricut Challenge Blog. I had made these "EEK" plaques a few weeks ago (you can find directions HERE) and decided they looked a little lonely so since I had just revived the Happy Hauntings cartridge in the mail that day I decided t look through there and see if there were any saying that I could cut out to go along with the EEK! I really liked  the font from the  "Spooky" and "Creepy" so I went with those cutting both at 5-3/4 on black cardstock. Then I turned them over and ran them through the Xyron to get adhesive on the front side of them. I then added some fine glitter and stuck them on the wall. As the day went on I thought they needed something more so.........
 I went back in to the cricut and cut the shadow of each word out with this orange and black polka dot paper from DCWV.

 I'm not sure if I love this but I am calling it good for now, I thought that maybe after Halloween is over I can use them in the scrapbook for one of my kids :)
Thanks for stopping by today and make sure to check back tomorrow for an awesome giveaway you wont want to miss it! :)

Friday, October 8, 2010

Robotz Birthday Party Day 5- Food Signs!

Well this is it, the last day of the Robotz Party themed decorations! These bolts were cut from page 71, I did the shadow (black cardstock) at 10 inches and the white cardstock is cut at 9-1/2 inches. I wanted the shadow to be a bit bigger. The letters were cut at 1-1/2 on the same papers as the 3-D Robotz, I just used up my scraps from those :)

Well I hope you had a fun week with me, if you decide to make any of these I would love to see what you come up with. Have a great weekend!