Friday, February 27, 2009
Valentine mailboxes
I found these last year from Karen Foster but Valentine's had already passed so I got them out this year and made them up for my kids. I went and found a few little items that would fit inside and then lined'em up on the counter in the morning for them.

January's Sheetload
All of the following cards use January's Sheetload These were 2 quick baby cards we made, I love the new spiral punch from Stampin' Up! it's so cute I have been using it alot
 These were 2 quick baby cards we made, I love the new spiral punch from Stampin' Up! it's so cute I have been using it alot
random cards
Here are some cards I thought I would share, these have been made for awhile but I like them so here they are. This turtle card Savannah and I lifted from the Summer 2008 CTMH catalog (pg 57) we really thought it was cute and didn't have the exact stamp set so we cut out some turtles with our CRICUT. Then we foax stitched with a stamp set we did have. We left them blank so we can add the desired message.

I made this one probably over 2 years ago, I really like the simple-ness of it and the stitching around the cute patterned paper that I am sorry you cant see better :( Left these blank to add desired message.


I had found this stamp at Jo-Ann's and really wanted to use it so this is what I came up with, pretty simple but once you add a greeting then it will have a little more

And finally this cute little (birdie) card, this is from a SHEETLOAD but i only used about half of the squares it called for, you can find it here.

Tuesday, February 24, 2009
Here's my "shout out" to Sheetload
I have been a BIG fan of this site since I found it and this month is no exception. They have some great blog candy this month for anyone who posts a link found here to their extra cool stuff, while your there be sure to check out this months SHEETLOAD found here for some fun ideas sponsored by UNITY Stamp Co. What are you waiting for, go check it out.... :)
Friday, February 20, 2009
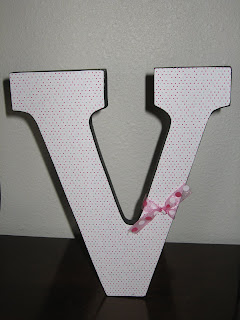
"LOVE" Letters
Thursday, February 12, 2009
Mini Pizza Box Card Holder
I got this cute idea from http://inkingidaho.blogspot.com/ (you have to pay for it from her, it's part of her 12 days of Christmas on the side) and the original idea came from Jen del Muro here she did a great job so I thought I would give it a try. Finished size is 4 x 4 x 1


Monday, February 9, 2009
card holder bag
This was the 1st little bag card holder I made last week used Stampin' UP! papers and CTMH stamps.


bday present for my niece
Thursday, February 5, 2009
fun desk calendar
Thanks to Sister Sorensen for giving me this cute idea, I had to make several of course. Since I didn't have a computer I hand stamped all those little calendars, from Feb. to Dec. times 8!!! Thanks to Close to My Heart from coming out with an awesome calendar stamp WOHOO! Oh and these are made with the clear photo holders from the dollar store. very inexpensive!

get well card
There was a really cute card I saw in a card magazine and had to try it out. I loved the band-aid look for a get well card and it was really easy.
stamp is from studio g (Savannah gave it to me for my bday :0)
brown paper for band-aid is 3x1 or 3x1.25 (depending on the look your going for)
use a corner rounder and round corners. with a stylus and a ruler I scored to back of the paper as shown then on the front side the image was raised so I sanded it slightly with a file. take a 2nd brown paper and layer it under the embellished one. adhere to card. super easy!

Subscribe to:
Posts (Atom)


